
When it comes to Polymeric Sand, there are many options available on the market. How do you know which product is best for your specific application? In this blog post, we will break down the features and benefits of each type of best Polymeric Sand, so you can make an informed decision before purchasing.
What is Polymeric Sand?
Polymeric sand is used as a filling material for joints or seams between concrete pavers or natural stone. This product helps to improve interlock and create a more durable, cohesive joint.
Polymeric sand can improve the strength and durability of a surface while helping resist damage from freeze/thaw, extreme heat, and erosion. In addition, polymeric sand helps to prevent weed sprouting and damage caused by insects.
The best polymeric sand for your paver installation
Pavers are a popular choice for high-end hardscape projects like patios and walkways. However, over time water can seep underneath the pavers and weeds and grass can grow through the cracks. This can leave your pavers looking messy and uneven. To keep your pavers looking their best, it is important to regularly clean and seal them.
Techniseal was the first company to launch polymeric sand in the early 2000s. Hardscape specialists use this material to fill paver joints, the spaces left between each paver, tile, or natural stone. Today, many homebuilders consider it to be the ultimate paver jointing material.
Polymeric sand is a popular choice among hardscape professionals for its ability to block insects and weeds, as well as stabilize joints.
Polymeric sand can be an excellent way to improve the stability and appearance of your pavers, but it is not as well known as it could be. How does it work? The sand contains silica, which binds the particles together when activated. As the sand particles fuse, the joint between the pavers becomes much stronger.
We’ve gathered some of the best polymeric sand options on the market, perfect for a variety of applications.
[slide-anything id=”2081″]
What factors should you consider when choosing the best polymeric sand?
Before making your purchase, keep in mind certain pointers that will be beneficial for you. This buyer’s guide will help you consider the different key aspects before making the final purchase. It will also help ease any confusion you have after reading it.
Gap Size
Polymeric sand is used for joints between pavers that are 1 inch or smaller. This type of sand drops easily into cracks and provides the necessary protection against water, grass, weeds, and insects.
Polymeric dust is a great option for paver projects or fieldstone patios with larger joints. While it might seem strange that a finer material would be better for a larger gap, the dust creates a stronger barrier once it settles and does a better job of sealing out the elements.
Quality
Polymeric sands made of finer sand can prevent weed growth and damage caused by insects by filling the smallest and tightest joints.
Polymer or Adhesive
Polymeric sand is coated with a bonding agent that causes the grains to adhere to one another when exposed to moisture.
The most common type of adhesive used in polymeric sand is silica. This forms a strong bond between the individual grains of sand and the pavers. When the ground shifts due to water or weed roots, the silica flexes and keeps the pavers in place.
Cement
Some polymeric sand manufacturers add Portland cement to their sand recipes. This creates a hazing around the pavers, which is a white or light gray film.
If you’re looking to avoid haze when using pavers, it’s best to choose a product that doesn’t contain cement. There are plenty of low-haze options on the market that don’t use cement in their mixture.
Color
Polymeric sand is available in a variety of colors that will coordinate with or complement your pavers. Dry pigments are added to the sand to create greens, whites, browns, blacks, tans, and grays. This added touch can make a basic patio or walkway more visually appealing than plain beige sand.
Adding a touch of color to your paving project can really make it stand out. Colored polymeric sand is a great way to add a designer touch to your project. Choose the color that best compliments your pavers for a truly unique look.
Drying Time
Polymeric sand dries quickly, making it ideal for pavers that will see foot and vehicle traffic. Unlike concrete and cement, polymeric sand can be applied shortly after a project is completed, allowing life to return to normal more quickly. In most cases, polymeric sand is ready for foot traffic after 24 hours.
Before parking a vehicle on a driveway, wait 48 hours for it to dry. Note that these drying times are based on sunny weather conditions. Always check the forecast before installing polymeric sand, as rain can wash it out from between the pavers and create a mess.
Application
No matter the brand or manufacturer, the process of applying polymeric sand is similar. The steps for application are as follows:
Ensure that all pavers are properly placed and even. Use a hand or plate tamper to compact them so that they are stable and level. Work in small sections, pouring a bag of polymeric sand over 16 square feet.
Using a wide push broom, evenly spread the polymeric sand around the pavers until it fills the joints within ⅛ inch of the top of the paver. If the pavers have beveled edges, fill the sand to the bottom of the bevel. Use a hand or plate tamper to tamp the sand into place. Look over the area to check that the sand is level with the pavers.
To activate the adhesives that bond the grains, set a garden hose nozzle to “shower” and soak the surface. Only add as much water as will soak into the sand. Be careful not to add too much water, as it can separate the adhesive and cause a milky haze. Allow the surface to dry according to the manufacturer’s instructions.
Our Top Picks for Best Polymeric Sand
Here are some of the best polymeric sands based on the above shopping considerations:
- DOMINATOR Polymeric Sand with Revolutionary Ceramic
- Alliance Gator Maxx G2 Intelligent Polymeric Sand
- BuddingCo Polymeric Sand
- Mutual Industries Lock-EM-Up Paver Sand
- Rhino Power Bond Plus – Polymeric Sand
- ConSANDtrate Polymeric Sand Concentrate
- Alliance Euroston Bond Polymeric Sand
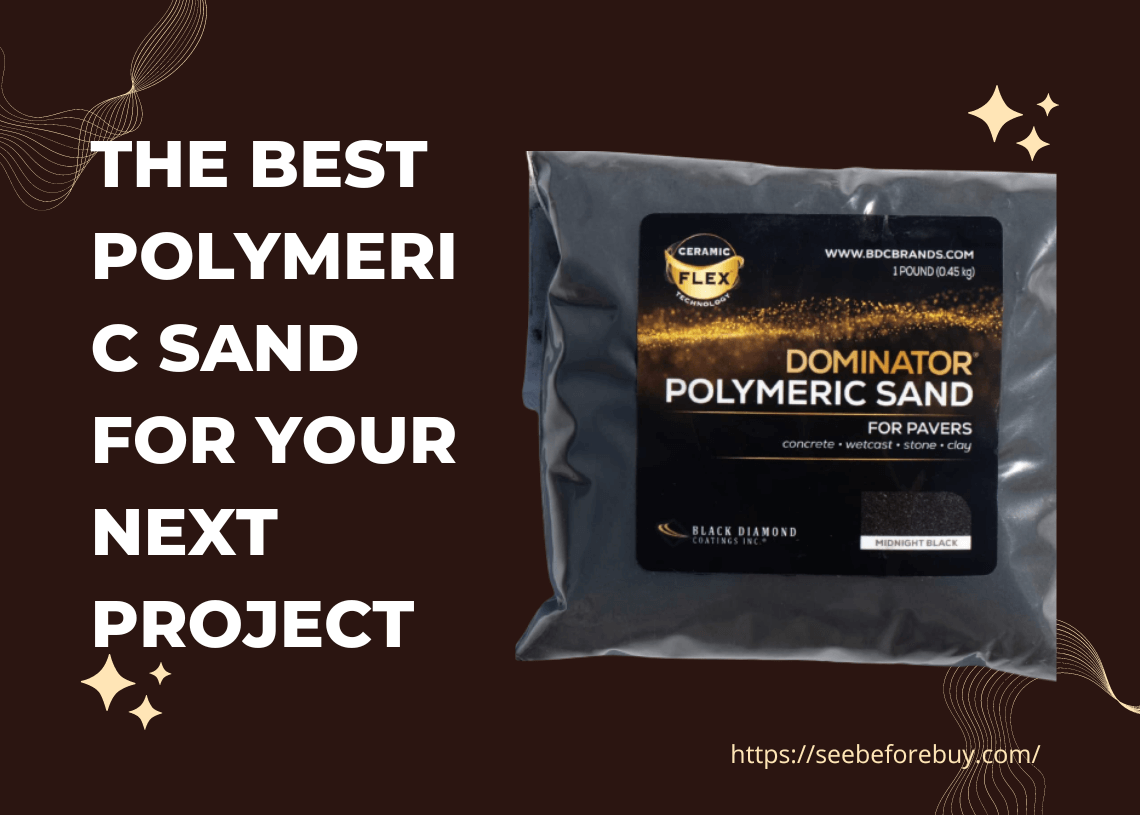
No #01 DOMINATOR Polymeric Sand with Revolutionary Ceramic
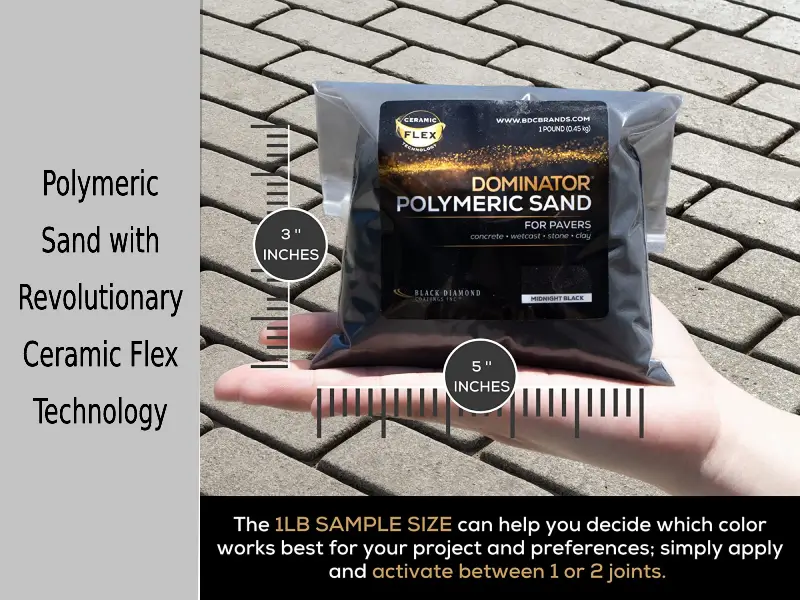
So, we’re looking at the DOMINATOR Polymeric sand from Black Diamond coatings today. You can get it in 1, 13, or 45-pound units, and it comes in 5 colors.
This sand uses the company’s Ceramic Flex technology and can be used to pave 4-inch wide joints.
Why do we like this DOMINATOR Polymeric Sand?
We read a lot of good reviews about the DOMINATOR polymeric sand and decided to give it a try. We’re glad we did – it’s a great product that can give your home projects a professional touch.
The sand comes with a pretty detailed instruction manual that’s easy to understand. So, if you follow the instructions carefully, applying the sand should be a breeze.
Thanks to the high-quality sand and polymers, you will find that the fine sand sweeps in the joints quite well. Furthermore, you can use it to pave joints that are almost 4 inches wide, as mentioned. Although this product is a little more expensive than the rest, its overall versatility makes it worth the price.
What Could’ve Been Better?
We did notice some limitations to this sand, like it being difficult to apply in colder temperatures and taking a long time to set in humid or wet conditions.
PROS:
This is an easy to use and apply product that is ideal for use in homes and office spaces. It is durable and long-lasting. It comes in a wide range of choices.
CONS:
Applying this product in colder temperatures can be difficult.
No #02 Alliance Gator Maxx G2 Intelligent Polymeric Sand
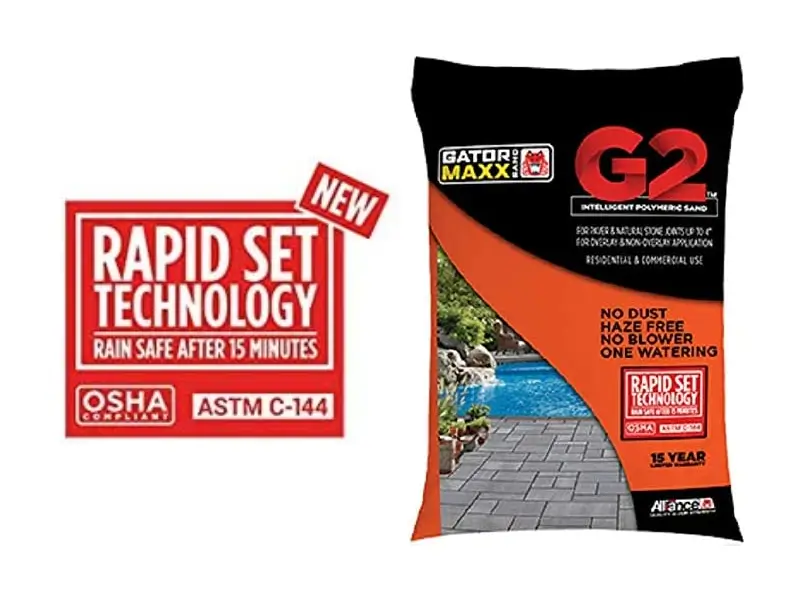
So the next product we’re gonna break down for you is the Gator Maxx G2 Intelligent Polymeric sand. It’s pretty similar to the last option in terms of functionality and features. It comes in 50-pound bags and is sold by Alliance Designer Products.
Why did we like this Alliance Gator Maxx G2 Intelligent Polymeric Sand?
We tried the Alliance Gator Maxx G2 after seeing how well the previous option worked. Alliance Designer Products made a great polymeric sand that was quick and easy to apply.
This sand is great for paving because it doesn’t create any dust or haze. That’s really convenient, and it’s one of the things we liked about it when we were using it.
The sand settles quickly, so we only had to water it once. Once it settles, it becomes quite durable and solid, able to withstand any weather conditions and temperatures.
What Could’ve Been Better?
The Alliance Gator sand is great, but we still noticed some downsides. It comes packaged in a bag, which can puncture easily. Also, the price, despite being lower than the previous option, is still relatively high. If you’re inexperienced, you might need to do some digging for instructions.
PROS
Dries quickly, durable, can withstand most weather conditions, can be applied in colder temperatures, can be used on different surfaces, easy to apply.
CONS
No comprehensive instructions for inexperienced users. Poor packaging choice.
No #03 BuddingCo Polymeric Sand

Up next, we’ve got polymeric sand made by Budding Company. It’s got the same features and functions as the last two products, but it comes in a smaller 18-pound container with 288 ounces of polymeric sand.
Why did we like this BuddingCo Polymeric Sand?
One of the things that attracted me to this product was its price. If you’re looking for polymeric sand that’s a good value, this is the one to get.
BuddingCo Polymeric Sand has a great coverage area of 18 square feet, making it more efficient than our previous options.
This polymeric sand is great for false joint pavers – it’s easy to use and quick to apply, and it settles quickly without washing away easily. Plus, the joints remain flexible even after the sand has settled.
What Could’ve Been Better?
We noticed a few downsides to this polymeric sand that might make it less useful for some people. First, the low volume in each unit is often not enough.
You might need to buy more unless the paving area is small, and there are no application instructions, so if you consider yourself a beginner, you may find it challenging to use.
PROS
- Good value for money
- Good coverage area
- Different surfaces can be easily paved
- Prevents erosion of paved surfaces
- Durable and flexible after solidification
CONS
No instructions for beginners. Packaged capacity is often insufficient.
No #04 Mutual Industries Lock-EM-Up Paver Sand
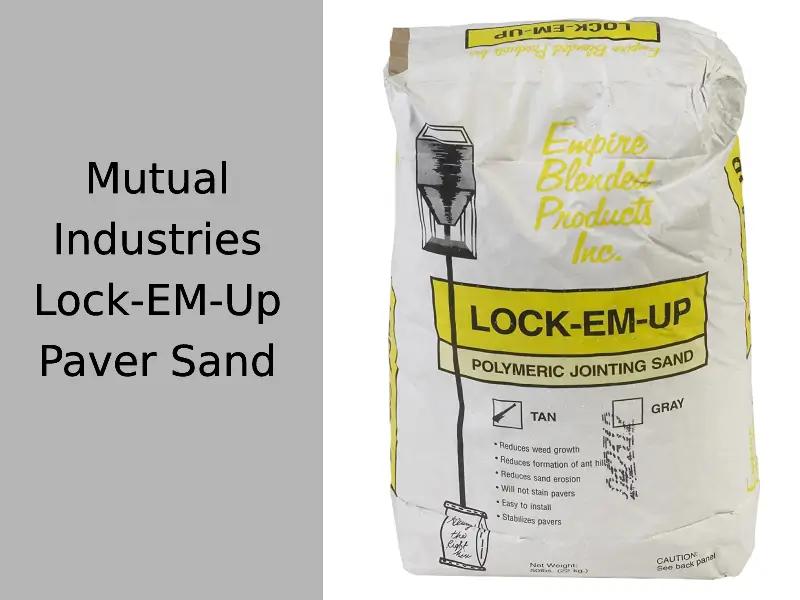
Moving forward, we have the Lock-EM-up paver sand from Mutual Industries. This polymeric sand consists of two base materials – silica sand and polymer bonding agents. The silica sand itself is high-grade angular sand that is adequate for paver joints. The sand comes packaged in bags with a capacity of fifty pounds.
Why did we like this Mutual Industries Lock-EM-Up Paver Sand?
We were impressed with the high-quality, blended angular formulation of Lock-EM-up paver sand. This jointing sand also comes with good-quality polymer binding agents that effectively bind the pavers.
We also found that the sand does a pretty good job of preventing cracks and erosion in the pavers.
It is important to note that each unit of polymeric sand consists of 50 pounds. Therefore, if you follow the instructions and apply it properly, the sand will have a good coverage area and be sufficient for most paver projects.
The two colors tan and gray look good together and blend in with the pavers. We found out that it was effective in controlling weeds in pavers.
What Could’ve Been Better?
We noticed that this poly sand isn’t the best in some areas. It takes a while to bind and it needs to be watered often to harden. This can make the time and labor required longer, which can be kind of a pain.
PROS
This sand seems alright – there’s a decent amount in each bag and it covers a good area. Once it dries it looks great, and the instructions that come with it are easy to follow.
CONS
It takes a long time to set and harden properly.
No #05 Rhino Power Bond Plus – Polymeric Sand
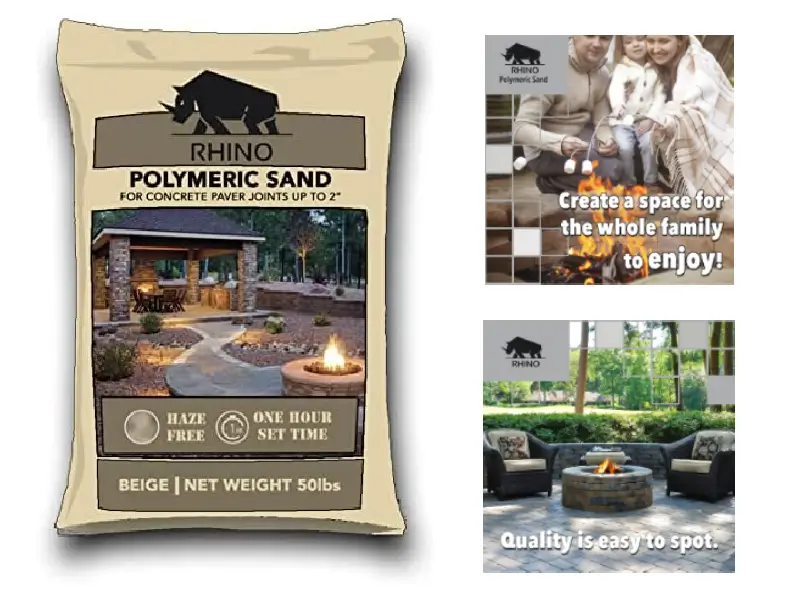
We’ve looked at the Rhino Power Bond Plus Polymeric Sand, a jointing sand that can be used for both residential and commercial purposes. It comes in four colors – beige, slate gray, black, and ivory. It’s a good option if you’re searching for a jointing sand.
Why did we like this Rhino Power Bond Plus?
We were intrigued by the Rhino Power Bond Plus polymeric sand, which is less well-known than our previous choices. People who have used it seem to like it, so we decided to give it a try. We were also intrigued by the features that this product comes with. Having four different color choices was an added bonus.
This poly sand is awesome because it doesn’t make a huge mess like other kinds of sand. You don’t need a blower to get rid of the dust, and you only have to water it once for it to be activated. Plus, it settles really quickly.
We found this product to be quite convenient because it cuts down on labor and time requirements. Another nifty perk is that it comes packaged in waterproof bags, so you can safely store it outdoors. This is especially useful if you have storage concerns.
What Could’ve Been Better?
This poly sand is way underrated compared to our previous choices, but that doesn’t mean it’s a perfect choice with no downsides. This polymeric sand can only be used for joints up to 2 inches, which makes its use pretty limited.
PROS
- Easy installation that doesn’t require much time or effort.
- Comes in four different colors to choose from.
- Waterproof bags can be stored anywhere, which is handy.
CONS
The cons of this product are that it can only be used for joints up to 2 inches.
No #06: ConSANDtrate Polymeric Sand Concentrate
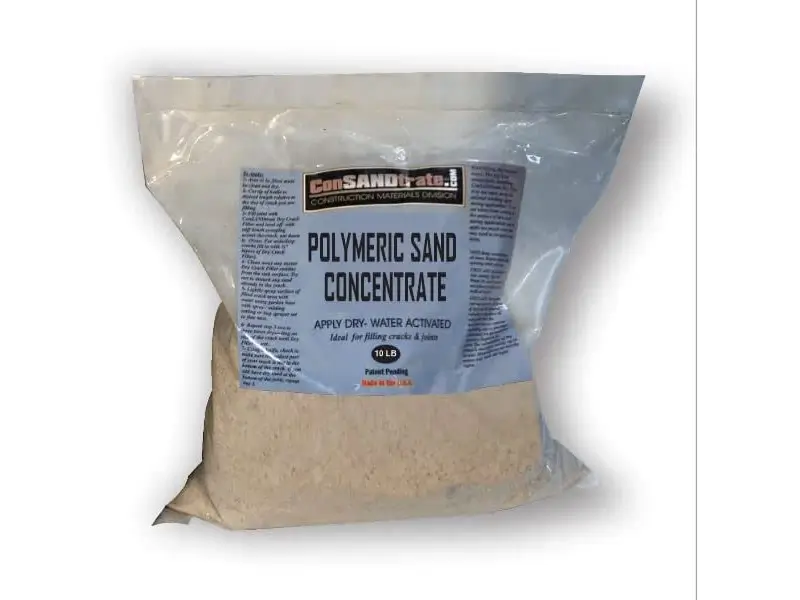
This polymeric sand concentrate is a great product that can be used to make your own custom sand. It’s a blend of polymeric binding agents that makes it a great choice for anyone looking for a high-quality product.
Why did we like this ConSANDtrate Polymeric Sand Concentrate?
This polymeric sand concentrate is a mix of different binding polymers, so it comes in 10-pound containers.
You can easily create around 100 pounds of polymeric sand with this concentrate. The binding polymers firmly bind the joints to make them durable. It’s great that we can mix our own polymeric sand in different concentrations.
This can come in handy for a paver project – you can whip up your own sand according to your needs. Plus, the sand lets you mix custom colors, which is a neat trick.
Since it’s a concentrate, it’s relatively cheaper, and you can use it to make more poly sand to cover a larger area, which is great value for your money.
What Could Have Been Better
As we noted, one potential downside to using poly sand is that it can wash away if not mixed correctly. Also, if you don’t get the proportions right or use the wrong sand, you might end up wasting the product. So it’s important to be careful while mixing.
PROS
The main advantage of poly sands is that you can mix different concentrations to create custom colors. You can also use it to bind joints strongly, which can be a great money-saver. Plus, it provides great value for money overall.
CONS
Can be easily washed away. Can prevent wastage if mixed properly.
No #07 Alliance Euroston Bond Polymeric Sand

If you’re familiar with polymeric sand, you’ve probably heard of Alliance. We’ve reviewed one of their products before, which is a testament to how popular and reliable the brand is. The Eurostone Bond is no exception.
Why did we like this Alliance Euroston Bond Polymeric Sand?
This poly sand is perfect for natural stone pavers, regular cobble pavers and bricks, or even for overlay or non-overlay paving projects.
This polymeric sand is super versatile and can be used in a bunch of different paver projects – from residential to commercial ones. It’s really good at keeping weeds away from cobble and stone pavers, and produces almost no haze in pavements.
Also, this polymeric sand can easily be set above freezing temperatures. And, the sand comes in waterproof bags so you can store it outdoors without worry.
What Could’ve Been Better?
The Alliance Eurostone Bond is a decent polymeric sand, especially for natural stone pavers. However, it can only be used for joints up to 1.5 inches, which is relatively low. Also, there is only a single color choice for this product, which is somewhat inconvenient.
PORS
This paver sealer can be used for different paving applications and sets easily at above-freezing temperatures. It can be stored easily and makes no mess in stone or cobble pavers.
CONS
If you’re looking to use this for anything bigger than 1.5 inches, you’re out of luck.
Our Verdict
The DOMINATOR polymeric sand is a great product that is reliable and effective. It is available in multiple colors to suit a wide range of styles.
If you’re looking for a professional-looking finish that’s still easy for DIYers, the Alliance Gator polymeric sand is a good option. It helps block insects and weeds from getting between your pavers.
How We Pick the Best Polymeric Sands
We looked at the quality of the materials, the area covered, the drying time and temperature, and the consistency of the color when choosing our top picks for polymeric sands. We wanted to make sure to include several options from brands that offer different colors, so that shoppers could find the polymeric sand that would work best with their project.
Our recommendations are all made from high-quality materials with impressive minimum working temperatures, which gives users more flexibility in choosing when to start this type of project—some of our top picks can even be poured in 32-degree weather.
Finally, we included a range of container sizes to limit product waste and help shoppers purchase only the amount they need – which keeps budgets low.
Applying Polymeric Sand to an Existing Patio or Wall
As patios age, it is common for them to settle, wear down, and erode. Rather than simply using regular sand to fill in the gaps between pavers, polymeric sand can be used to create a more durable and long-lasting surface.
If you don’t properly seal paver joints, much of the sand you put in will wash out after a few heavy spots of rain and you may see weeds pop through before you finish packing up at the end of the job. This will decrease the quality of your work, increase the amount of maintenance required, and decrease customer satisfaction.
Polymeric Sand vs. Regular Sand for Pavers: Which is Right for You
Polymeric sand is a specialized mixture of sand and additives that is used to fill the joints between concrete pavers and brick pavers. When the proper preparation is taken (such as weed killer, insect repellant/removal), this polymeric jointing sand has the potential to reduce weed growth, resist rain washout, and provide a long-lasting, durable finish.
Using The Best Polymeric Sand for Paver Joints
It is more expensive and requires more time and attention to detail, but using Polymeric Sand will result in better results that last much longer. Polymeric sand products such as TechniSeal NOCOSTORM or TechniSeal Polymeric Joint are designed to resist weed growth and to have a long-lasting, professional finish.
You will need a few other items in addition to the polymeric sand, which will be referred to as “sand” from here on. The number and type of items you need will depend on the condition of the patio. At the very least, you will need a garden hose, an adjustable nozzle, and a broom.
Additional equipment that may be required for this job includes a pressure washer, leaf blower, and non-selective herbicide. Additionally, you may need additional pavers, paver sealer, and a small, sturdy brush. Before beginning this project, we need to have a discussion about what is achievable.
If the pavers are so crooked and busted that you can’t walk across them without tripping, you really have a major project on your hands. In this case, you need to pick up every paver, level the ground under it, and reposition the pavers, replacing any that are broken. This is certainly cheaper than having to replace the entire pavement.
Getting Started Using The Best Polymeric Sand
In order to use polymeric sand, you must first remove all of the existing sand down to the bottom of the paver. Polymeric sand works best when applied at full depth.
The pressure washer is the best tool for the job, but you can also get down on your hands and knees and use a brush to dislodge the sand. I strongly suggest wearing goggles or a face shield (not just safety glasses) when using a pressure washer, and maybe even a rain coat! This will keep you from getting wet and dirty.
You will need:
- Polymeric jointing sand
- A broom
- A leaf blower
- A water hose
- A power washer
Weeds
If you have a lot of weeds in the joints, you may want to start by getting rid of them. Before you remove any of the old sand, apply a non-selective herbicide. You will need to let this sit for a few days before you can continue.
Weeds often have strong, deep roots that can spread below the pavers. Things like Bermuda grass can form entire colonies, making them tough to eliminate. The weed killer will not only kill what you see on the surface, but also help to control the roots underground.
If you are noticing an increase in weed growth, it may be necessary to inspect the area beneath your pavers. If there is a large mat of weed roots, it is likely that the weeds will return. Taking proactive measures to remove the roots will help to prevent future weed growth.
Although weeds can grow through concrete over time, polymeric sand has a high chance of stopping them in areas with a high infestation. Under normal weed conditions, removing the old sand will eliminate most of the weeds and deter them from returning.
Staining
There are a few key things to keep in mind to get great results. The biggest challenge you will face is preventing staining. Every type of polymeric sand is susceptible to staining under the right conditions.
There are two factors to consider for a successful outcome. The first is to make sure the pavers are dry. Not just the surface but most of the way through. That means that if it has rained for three days, then stops, and the sun pops out you can’t just run out and put down the sand. The water will wick up through the paver.
If you need to use a pressure washer to remove the sand that is left from the original installation, you can’t pressure wash and apply polymeric sand on the same day. I should warn you that getting the stain off is a huge problem, so it’s best to take the time to avoid it in the first place.
One suggestion: avoid using these products on red clay bricks. They may stain despite your best efforts. Additionally, it is important to remove all of the dust created when you put the sand down.
After you have swept everything that you can into the joints, a leaf blower set on low and held at about a 30-degree angle can be used to gently remove excess dust. This dust is what causes the stains once it is wet.
Applying Sand
When adding sand to the joints between pavers, be sure to pour it onto the pavers and sweep it into the joints. Then, use a broom handle or other blunt object to tap on the pavers. Tapping the pavers will help the sand to settle into place.
Sweep more sand into the joints until it is within 1/8” of the top of the paver. You don’t want the sand to be level with the top of the paver, especially if the top of the paver has a bevel. If the paver is beveled, the sand should be even with the bottom of the bevel.
Gently sweep all sand off the pavers with a small broom or brush. If you have access to a leaf blower, adjust it to the lowest setting, hold the blower about waist high, and blow excess dust from the pavers. Be careful that no one is standing immediately downwind. Once all dust has been removed, you can proceed.
False Joints
Polymeric sand is an ideal choice for filling joints in pavers that are at least ¼” deep and ¼” wide. TechniSeal SmartSand is a specialized product that is specifically designed for these types of applications. When cleaning off excess dust from pavers, it is important to take special care and avoid using a leaf blower, as this can damage the pavers.
If the blower is not angled properly, it is very easy to blow the sand out of the joints. When watering, closer observation is necessary, as the false joints will become saturated faster than the full-depth joints. Thus, you may need to apply more water to the full-depth joints.
Watering
It is important to ensure that the sand is evenly saturated with water without adding too much which would cause the polymers to float and become visible as a white, milky substance. Not only would this be unsightly, but floating polymers can also cause staining.
The best way to water sand is to adjust the nozzle to “shower” and water the pavers until no more water will soak in. Spray for a few seconds, then stop and observe. If the joints continue to take water, keep spraying.
When the sand can no longer absorb water, and before you remove the polymer from the sand, stop spraying. Once the polymer begins to set, it will be impermeable to water.
If you do not water your pavers thoroughly, the top layer will harden and the bottom layer will not, which can eventually cause the pavers to collapse. To avoid this, water your pavers in sections no larger than 10′ x 10′.
Protection and Traffic
Most polymeric sand jobs are done during the summer, when thunderstorms can occur without warning. To protect your patio in the event of a downpour, be sure to have a plan in place. A casual rain is not a problem, but a thunderstorm can cause serious damage.
However, a downpour within the first 24-48 hours can dislodge the sand. Simply covering it with plastic or a tarp will help prevent this. Downspouts that empty directly on a patio can also be a problem in the first few days. Try to divert this water somewhere else until the sand hardens.
All pedestrian traffic must be restricted for 24 hours and all vehicular traffic for 72 hours. The duration may vary depending on weather conditions. Hotter and drier weather will result in a faster cure.
Applying a Sealer
The application of a water-based sealer like Sakrete Wet Look sealers does an excellent job in making old pavers look like new or keeping new pavers looking great. Therefore, since you have already invested a considerable amount of time in this job, it would be beneficial to do it correctly and apply the sealer.
Applying the sealer is an easy process and relatively inexpensive. It is important to wait until the pavers have set completely before applying the sealer, which usually takes a few days.
Biggest Mistakes When Using Polymeric Sand
DOMINATOR® Polymeric Sand is quick and easy to install, but some people still make mistakes that can be time-consuming and costly. To avoid these mistakes, here are some tips:
No #1 – Damp Pavers or Joints
You must make sure that the pavers and joints are bone-dry before installing polymeric sand. If there is even a hint of moisture present, it will cause the polymers to activate too early, resulting in a haze on the surface, or the sand won’t set up correctly.
It is important to install polymeric sand during a dry period in order to avoid any moisture that could potentially damage the product.
No #2 – Under-Watering or Over-Watering
To ensure optimal bonding performance from top to bottom, it is important to properly water your joints using the “shower” setting on your hose attachment.
Under-watering on polymeric sand
Under-watering your polymeric sand can cause it to form a crust on the surface. If you only have a crust, you won’t have a proper bond in the joints. The crust can eventually break away, eroding the joint. Cracks and gaps can also form if the sand hasn’t bonded properly.
Over-watering on polymeric sand
If you overwater your sand, the polymers can separate from the sand and reduce the bonding strength. In extreme cases, the sand may not harden fully.
No #3 – Not Thoroughly Removing Excess Sand
Polymeric sand is a great stabilizer for your pavers because it bonds well. However, if it is activated and then allowed to dry on top of the pavers instead of between them, it becomes a problem.
If you apply sealer on top of sand-crusted pavers, it can make the problem worse and harder to fix. The sealer will enhance the rough texture and haze. Of course, if it is applied properly, it can create a beautiful finish to your polymeric sand project.
There are 2 critical times during installation when you must remove polymeric sand from the top of your pavers:
After you’ve swept your sand into your joints
When sweeping sand into your joints, be sure to use a hard-bristled broom to remove as much sand from the top of your pavers as possible. If your pavers have a textured or irregular surface, pay special attention to removal at this stage.
During the activation process
During the activation process, it is important to clean the top of the paver while simultaneously activating the polymeric sand in the joints. This can be done by using the shower setting on the hose sprayer.
Use a pushing motion while ensuring that no sand is left on top of the pavers. Any excess polymers and sand should be rinsed off the project surface. Go over the pavers with a leaf blower to remove any excess water and sand.
When cleaning your pavers, be sure to work in small areas and remove as much standing water and/or sand as possible. If your pavers have a highly textured or irregular surface, pay extra attention to ensure all sand and/or polymer dust is removed.
No #4 – Poor Drainage
One of the most important things to consider when using DOMINATOR Polymeric Sand is drainage. If poor drainage conditions are present, it can ruin your project. However, DOMINATOR Polymeric Sand is one of the most forgiving sands on the market, so as long as you follow these guidelines, you should be fine.
Pavers should be installed on a base with good drainage to prevent water pooling.
When choosing between pavers and stone for your next project, keep in mind that both options should be set on crushed concrete, limestone, aggregate, etc., with bedding sand in between. In some cases, thin pavers can be installed over concrete, again with bedding sand in between to provide a cushion effect and drainage.
There are different installation guidelines in different parts of the country to make sure the product works well in different types of soil and different climate conditions, and for different purposes (driving on it or walking on it, for example).
If you use polymeric sand in an area without proper drainage, the water will eventually wash it away. The polymers need water to harden, so if the water can’t escape, the sand won’t either.
Be sure to put some sort of border around your pavers, whether it’s natural or artificial. (h4)
If your pavers are level with the ground, this gives you a natural border and drainage. If you don’t have this, you should install a concrete border or edging to prevent washout at the edges.
No need to make your project area too steep, a slight slope will do just fine.
Don’t install polymeric sand if your project has areas that tend to hold water for a long time – this will help prevent problems with standing water on your pavers. A subtle slope will let water drain off your pavers each time it rains.
Keep in mind that if your pavers are next to your house or any other structure, the slope should go down AWAY FROM the structure.
No #5 – Overfilling Your Joints
This is a mistake people often make. They think it’s best to fill their joint all the way up to the top, but it’s actually more important to leave about 1/8″ from the top of the pavers. This allows for better joint stabilization.
Further, if you overfill your joints they’ll break down and look bad over time. It’s best to leave a 1/8″ gap at the top to allow for proper bonding and adherence.
No #6 – Too Narrow or Too Wide Joints
The ideal width for the joints between your pavers is between 1/8th and 4 inches, and the depth of the joint should be at least 1 inch. This will allow the polymeric sand to bond properly.
As you can see from the photo, too-thin or extremely narrow joints can cause spill-over during the activation process; the tight channels don’t allow water to flow and soak down to the bottom of the joints when showering with water.
The sand is just pushed out of the joints. This is why we don’t recommend using polymeric sand on really narrow joints. Similarly, too-wide joints can cause washout, because they allow too much water flow during the activation process.
FAQs
Still have questions about polymeric sand? Here are some answers to commonly asked questions.-
Is polymer sand safe?
As the MSDS says for many manufacturers, it’s important to wear a breathing mask when using polymer sand products. I did some research but couldn’t find any concrete data. Nevertheless, most polymer sand manufacturers use Silica as one of the key components.
The thing about inhaling silica for too long is that it can screw up your lungs, causing a condition called Silicosis. ignoring Silicosis can lead to lung fibrosis and an increased risk of developing tuberculosis. So, basically, when I’m working on a paver project or using poly, I need to be careful not to breathe in too much dust.
What is the difference between regular sand and polymeric sand?
The main difference between regular and polymeric sand is that polymeric sand uses chemical binders that hold your pavers together after you activate them with water. Regular sand is just silica, which does not bind with your pavers.
How does polymeric sand work?
Polymeric sand is a mix of sand, adhesive and sometimes Portland cement. Pushing it into the joints, water activates the adhesive and the sand grains bond together, as well as to the pavers, creating a durable surface.
What is the ideal temperature for applying polymeric sand?
In ambiguous situations like this, I always go with what the polymeric sand manufacturers recommend. Makes sense, right? Most of them recommend a minimum ambient temperature that’s just above freezing when applying the product.
Some manufacturers recommend a temperature range of 40-50 degrees Fahrenheit for better binding and end results.
Should one use polymeric sand around pools?
Yeah, definitely go ahead and use polymeric sand around the pools. It can sometimes wash out a little bit, so you might have to keep reapplying it.
How long does it take for polymeric sand to set?
Polymeric sand typically takes 24 to 48 hours to set. However, different brands can have different setting and drying times.
How long does polymeric sand last?
Polymeric sand has a pretty long shelf life, usually lasting up to 10 years before it needs to be replaced. Some manufacturers even claim that their products can last up to 15 years.
